|
Page Directory
Introduction
Wipe On Varnish
Oil & Varnish
Varnish Oil Variation
Danish Oil
Sam Maloof
Dalys/Waterlox
Gel Varnish
SealACell
Brushing Lacquer
Brushing Poly
Brushing Varnish
Amana Varnish
Spraying Varnishes
Spraying Lacquer
Sikkens Cetol 1
Prep the Surface
Smooth Out Poly
Plywood Fuzz
Finishing Articles
Staining Problems
Spray Water-Based
Spray Booth
Butcher Block
Pro Finishes
Pro Equipment
Topcoats-Shellac
Finishing Links
Glossary
Site Directory
Home
Tool Reviews
Projects & Plans
Articles
Our Shop
FAQs
Sites I Like to Visit
Build a Kayak
E-Mail Us!
|
|
Introduction
Welcome to our web page regarding finishing woodworking projects. Finishing can make or break a great woodworking project. I am not a professional finisher by any means but I have discovered and learned a number of finishing methods that work well in the homeshop. The purpose of this article is to describe several fool-proof finishing methods, including their pros, cons, and application methods. However, before I do that, let's look at a conventional finishing process used by pro cabinet shops:
- Sand Bare wood with 120 through 180-grit paper. Clean surface.
- Apply toner to even out differences between different boards. Do Not Sand
- Apply stain. Do Not Sand.
- Apply sanding sealer. Allow to dry. Sand with 320-grit paper.
- Apply Two or more coats of a solvent-based finish, sanding lightly between each coat.
- Allow to cure and rub out finish.
These steps seem pretty straightforward, but many homeshop finishers have difficulty making the conventional finishing process work because, typically:
- Homeshops have inadequate equipment. The pros have high quality spray guns, respirators, clean and ventilated finishing rooms, waterfall or other high-tech filters, and so forth.
- Homeshops offer poor environmental conditions. The pros have environmentally controlled conditions. The temperature, humidity, and alignment of the moon and stars is strictly controlled. Read the labels of most finishes. They describe environmental conditions that NASA would have a hard time meeting.
- Homeshops have inadequate, improper light. The pros have the proper type and amount of lighting. It is positioned to avoid shadows and to allow finishers to actually see what they're doing.
- Homeshop woodworkers use Home Center finishing materials. The pros use finishing systems. Such systems include stains, sealers, and top coats. They are designed by chemists to work together well. Given the right equipment and environmental conditions they dry quickly, can be sanded and rubbed out, and last forever. The homeshop guy fights with multiple brands of Home Center materials that are not designed to work together.
Is all lost for the homeshop finisher? Absolutely not! In fact, many respected professional furniture builders, woodturners, and so forth use finishing processes that do not require sophisticated equipment. Let's look at several fool-proof clear finishes that work in the homeshop environment. By the way, I am open to any additions or modifications you might have to this article. Email me your comments and I'll make the appropriate changes/additions...
Note: As always on this web site, bold-faced blue text is a link to another page.
Finish #1: Wipe On Varnish (Mix Yourself)
|
| Pros:
| Easy, virtually foolproof to apply
No drips/runs/sags
Dries quickly (few dust nibs and multiple recoats in one day)
Low maintenance, does not dry out
Moderate protection
Penetrates better than full bodied varnish(subjective)
|
| Cons:
| Requires many coats to get reasonable depth and protection
Lengthy application time for large surfaces
|
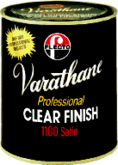
The Wipe On Varnish method works virtually for everyone and works for a variety of furniture and other woodworking projects. I do not promote its use for kitchen cabinets unless you are willing to apply six to ten coats. Over the years I have used Varathane Professional Finish, Minwax Fast Drying Polyurethane, Olympic Polyurethane, and the Sherwin Williams Fast Drying Oil varnish. I tend to use the Varathane and Minwax products the most. I like the fast drying characteristics of the Sherwin Williams product, but it dries too fast if you thin it with Naphtha. Although I mix my own, you can purchase a variety of wipe on varnishes. I would not use a water-based polyurethane as a Wipe On varnish. However, with that said, Jeff Jewitt posted an article on the Target Coatings web site that states you can.
- Prepare the surface to be finished.
- Mix your Wipe On Varnish. I have tried many varieties and mix ratios. I generally thin the poly by 20% to 50% using solvent. For solvents, I use thinner, mineral spirits, and naphtha. I prefer naphtha because it seems to dry faster than thinner/mineral spirits and it has less odor. Others report that naphtha is clearer than mineral spirits. I only mix what I will use during one day. I have had best luck with gloss varnish. Others report using semi-gloss. I and others recommend that you not use satin. I do not use semi-gloss or satin because they contain light defractors that muddy up the finish, in my humble opinion. Plus, with gloss poly, I can control the final sheen of the surface to end up being gloss, semi-gloss, or satin.
- Put some of the finish on your applicator (lint-free rag, t-shirt, or quality paper towel, i.e., viva.) A recent FWW article suggested using a squeeze bottle, which allows you to meter the amount of varnish you place on the applicator. Some finishers like to soak the applicator in the varnish.
- Wipe the finish on your project. There are several accepted methods:
- Wipe with the grain using a motion much like using a brush. I tend to use this method.
- Wipe with/against the grain in circular patterns. It is not necessary to wipe with the grain, and you might find some advantage in wiping against the grain of open pore woods such as oak--it tends to fill them better.
- Flood the surface and work the finish into the wood by using wet/dry sandpaper or steel wool. Clean off the excess with a paper towel.
- Experiment. Use a combination of methods. There is no absolute right way to apply Wipe On varnish.
- Once the surface is dry (4 to 8 hours), apply another coat. If more than 12 hours passes between coats, I lightly sand 320 grit sand paper.
- After applying the desired number of coats (minimum 3 to 4), I allow the surface to cure for a day or so. I level the surface by lightly sanding it with 600 grit wet/dry sandpaper and a sanding block, using a small amount of water as a lubricant. I then carefully apply one last coat. After 24 hours, I apply a protective layer of paste wax using #0000 steel wool. Allow the wax to setup a bit, and buff it out with a thick cotton towel.
- Or if I want a near-perfect finish.....I allow the finish to cure for a week or two and rub it out using #0000 steel wool and liquid soap/water. For a higher sheen I use a 3M automotive polishing compound I get from an auto body paint store. Jim Kull and others suggest a white polishing compound such as Dupont or Turtlewax. Haven't used them, again, experiment. Remember, you should never attempt to rub out a satin or semi-gloss finish since they have additives to diffract the light.
|
Finish #2: Danish Oil with Wipe On Varnish Top Coat
| 
| Pros:
| Easy, virtually foolproof
No drips/runs/sags
Few dust nibs
Variety of tinted Danish oils available
Less maintenance for owner than Danish Oil-Only Finishes
Leaves a nice sheen without plastic-look (subjective)
Danish Oil penetrates into the wood fibers
|
| Cons:
| Requires many coats to get reasonable
depth and protection
Lengthy application time for large surfaces
|
This is a variation of the process described for Finish #1 and a variation of the system offered by Jim Frye on the Wood Magazine Finishing Bulletin Board. I use a similar process with good results. It results in a thin but protective finish with an even satin sheen.
- Prepare the surface to be finished.
- Apply toners and stain according to their directions and allow to cure.
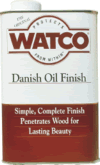
- Apply two coats of (Watco) Danish Oil (an oil/varnish blend) using your applicator (quality paper towel, t-shirt, a lint-free cloth.) On open grain woods like oak, check the finish periodically for wet spots and wipe them away. These wet spots can "erupt" from the wood's pores and grain for hours!
- Let the finish cure completely. This may take several days.
- Apply a wiping varnish (Varathane Professional gloss thinned 20% to 50% with mineral spirits) using a your applicator.
- If you wait more than 12-24 hours between coats, scuff the work piece with a gray 3M pad or 320 sandpaper.
- Repeat Step Five until you have the desired "build".
- After 24-hours, level the surface by sanding with 600 grit wet/dry sandpaper, backed up with a block of wood, lubricated with a small amount of water. Apply one more coat.
- Smooth and protect the surface with paste wax applied using #0000 steel wool, or for a near-perfect finish....
- Allow the finish to cure for a week or so. Rub out the finish with a white 3M pad or #0000 steel wool and paste wax. You can add a small amount of mineral spirits to thin the wax for easier spreading. Let the wax dry and buff it with terry cloth towel.
|
Finish #2A: A Wipe On Varnish Process Variation
|
| Pros:
| Easy, virtually foolproof
No drips/runs/sags
Few dust nibs
Variety of tinted Danish oils available
Less maintenance for owner than Danish Oil-Only Finishes
Great depth
Leaves a nice sheen without plastic-look (subjective)
Danish Oil penetrates into the wood fibers
|
| Cons:
| Requires many coats to get reasonable
depth and protection
Lengthy application time for large surfaces
|
- Prepare the surface to be finished.
- Apply one coat of Watco Danish Oil, applied by flooding the surface and sanding the oil into the work using 320-600 grit wet/dry sandpaper. Sanding in the finish leaves a glass smooth surface, even on red/white oak.
- Wipe off the excess oil. Re-wipe after an hour and again after several hours.
- After three to four days, wipe on one coat of Varnish, thinned by about 20-30% (I typically use Varathane Professional Finish).
- Wipe on another varnish coat, thinned by about 20-30%
- If you're happy with the surface build up, sand with 600 grit wet/dry sandpaper (and sanding block), lubricated with a small about of water. Clean and dry the surface.
- Brush/wipe on one coat of varnish, full strength or thinned by no more than 10%.
- Allow the finish to cure for about one week. Rub-out the finish with a white 3M pad or #0000 steel wool and paste wax. You can add a small amount of mineral spirits to thin the wax for easier spreading. Let the wax dry and buff it with terry cloth towel.
|
Finish #3: Danish Oil
|
| Pros:
| Easy, Virtually foolproof
No drips/runs/sags
No dust nibs
Variety of tinted Danish oils available
Satin sheen, hand-rubbed finish
Danish Oil penetrates into the wood fibers
|
| Cons:
| Requires many coats to get reasonable
depth and protection
Moderate to High Maintenance for owner
Lengthy application time for large surfaces
|
Many woodworkers like Danish Oil, Tung Oil, Linseed Oil, and other oil finishes. Primarily, woodworkers like oil finishes because they are easy to apply and do not require exacting environmental conditions or finishing equipment. Personally, I don't use typical Danish Oil or straight oils, because the finish requires continual maintenance. Straight Oil finishes tend to "dry out" over a period of time. If the piece will remain with you, you can touch up the finish using more oil, lemon oil, or wax. But if you're selling the piece or giving it away as a gift, you're placing the maintenance chore on to the shoulders of the owner.
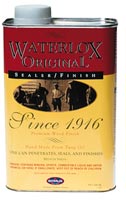
Consequently, for wipe-on oil finishes, I prefer varnish/oil mixtures such as Dalys, Waterlox, and "The Sam Maloof Recipe" These mixtures add resins to the oil (generally Tung oil) that provide an added measure of protection, build up, thus require little or no maintenance. At the same time, these finishes are easy to repair, and don't show scratches as easily as surface finishes.
To apply, follow the directions on the container. I find the drying times listed are usually too short and the number of coats are too few. For a satisfactory finish, I have used the following steps to apply Watco Danish Oil:
- Prepare the surface to be finished.
- Flood the surface with Watco.
- Spread the finish evenly using your applicator (paper towel, lint-free cloth, old t-shirt.)
- After a 15 minutes or so, flood the surface again. Spread the finish evenly using the applicator.
- After a few minutes, wipe off excess. On open grain woods like oak, check the finish periodically for wet spots and wipe them away. These wet spots can "erupt" from the wood's pores and grain for hours (even days)!
- Allow to dry, normally 24 hours. You can end up with a tacky finish if you apply a coat on top of a coat that is not adequately dry.
- Repeat Steps 2 through 6 until you reach desired depth and sheen you're after.
- Let the finish cure completely before applying a top coat or using the item. This may take several days.
By the way, for small work pieces or fretwork, I simply dip them into a "vat" of Watco and allow to drip dry.
I stole the following Danish Oil application instructions from the Fletco/Watco web site:
- Apply generously to dry wood using a brush, cloth, or roller.
- Let the finish penetrate 15 - 30 minutes.
- Before the first coat has dried, apply an additional coat in the same way. The wood should be saturated.
- Remove the excess finish with a soft cloth, wiping with the grain.
- If you want a topcoat, wait 72 hours before you apply it.
|
Finish #5: Dalys and Waterlox Tung Oil
| 
| Pros:
| Easy, Virtually foolproof to apply
No drips/runs/sags
No dust nibs
Satin to semi-gloss sheen, hand-rubbed finish
Penetrates into the wood fibers
Low Maintenance -- Does not dry out
A finish everyone will love to touch!
|
| Cons:
| Requires many coats to get reasonable
depth and protection
Lengthy application time for large surfaces
|
 I love these two finishes! People love to touch the work I finish using these tung oil products and the process described below. Both products contain resins that provide a durable, low-maintenance finish that won't dry out. I love these two finishes! People love to touch the work I finish using these tung oil products and the process described below. Both products contain resins that provide a durable, low-maintenance finish that won't dry out.
General Procedure
- Apply liberally with a hiqh-quality (viva) paper towel, folded into a pad.
- Let the finish sit on the surface for about 5 minutes.
- Work the finish into the wood with 400-600 grit wet and dry sandpaper.
- Wipe away any excess and allow to dry about 12 hours before reapplying.
- When satisfied with build and after finish has cured, apply paste wax with a pad of #0000 steel wool. Buff out using clean cloth towel.
It takes four to five coats to develop the build and sheen I like. The surface will feel very smooth without feeling "plasticy".
Waterlox offers at least three interior finishes: Transparent (sealer/finish), Low Sheen, and High Gloss. Just pick your poison.
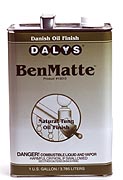
Daly's offers several finishes including the BenMatte Clear Danish Tung Oil finish that I use and a harder, urethene-based finish called PRO FIN (Semi-Gloss and Gloss). The BenMatte Tung Oil provides a low sheen finish--for a higher sheen, mix in equal parts of BenMatte and MinWax Fast-Drying Polyurethen (Gloss). I usually stick with the straight BenMatte and acheive a the desired sheen by buffing out the finish with paste wax. By the way, I purchase Daly's products from American Furniture Design, but you can also purchase them directly from Daly's Paint. Since they are not as well known as perhaps other brands, I have included extended contact information below.
The bottom line: you can't go wrong with Dalys or Waterlox!
|
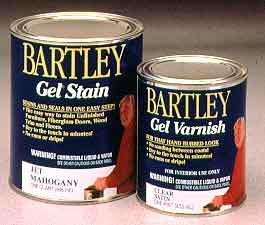
Finish #6: Gel Varnish
| 
| Pros:
| Easy, Virtually foolproof
No drips/runs/sags
Dries Fast (no Nibs and multiple
recoats in one day)
Low odor
Can mix various tints to color
the varnish
Low maintenance.
Hand-Rubbed satin sheen
|
| Cons:
| Requires 3 to 4 coats to get
reasonable depth and protection
Lengthy application time for
large surfaces
May not work on top of popular stains and sealers
Limited protection
|
I have used the Bartley brand of Gel Varnish with excellent results. It is great for jewelry boxes and other smaller scale projects. It dries quickly thus you can apply multiple coats in one day. You can apply it in virtually any environment. And though I am mixing apples and oranges, I also like gel stains, especially for difficult-to-stain woods such as maple and pine.
Apply according to the instructions that come with the product. Double the stated drying times unless the temperature is above 70 degrees and humidity is below 50%. I stole the bulk of the following staining and varnishing instructions from the Bartley web site:
- Prepare the surface to be finished.
- With a small cloth, apply a generous coat of Bartley Gel Stain to an area no larger than 8 square feet.
- With a clean cloth or soft paper towel, immediately wipe off the excess with the grain until the color is uniform and free of smudges.
- The newly stained surface should be nearly dry to the touch.Your first coat of stain is done! For a darker, richer tone, apply a second coat of stain. Up to three coats will add significant depth and richness of color. Allow six hours between coats. Do not sand between stain coats.
- Apply two to three coats of Bartley’s Gel Varnish. Gel Varnish is tack-free in minutes, and it is not necessary to sand between coats.
|
Finish #7: General Finishes SealACell
| 
| Pros:
| Easy, Virtually foolproof
No drips/runs/sags
Moderate drying times (few Nibs and
multiple recoats in one day)
Penetrates better than typical varnishes
Low maintenance.
Leaves a low sheen, hand-rubbed look
without the plastic-look (subjective)
|
| Cons:
| Requires 3 to 4 coats to get reasonable
depth and protection
Lengthy application time for large surfaces
Limited protection
Hard to find locally
Could require some owner maintenance depending on application
|
I used this finish once and liked the results. A growing number
of professional woodworkers looking for a natural, low-sheen finish
use SealACell. Check out the General Finishes web site for more
information. A recent Wood Magazine article profiled a furniture
maker that uses SealACell to produce a low sheen, hand-rubbed finish.
|
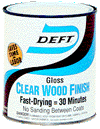
Finish #8: Brushing Lacquer
| 
| Pros:
| Beautiful, traditional, hard clear finish
Easy to apply
Limited drips/runs/sags with proper technique
Very fast drying times (little if no dust nibs and multiple recoats
in one day)
Low maintenance.
Variety of sheens (gloss, semi-gloss, satin)
May be rubbed out
Sands better than Polyurethane varnishes
Very good protection
|
| Cons:
| Lengthy application time for large surfaces
Obnoxious, toxic, flammable, and explosive fumes, requires lots of ventilation
Requires good brush technique
No foam brushes
|
A number of excellent brushing lacquers are available, including the Deft Clear Wood Finish. In fact, this is one of the first finishes I applied, as a kid. Apply using the following procedure:
- Prepare the surface to be finished.
- Use a natural bristle brush to apply finish. Brush with the grain, slightly overlapping each pass. Do not overwork, as the finish dries quickly.
- Allow to dry approximately 1 hour before apply additional coat.
- Optional: Sand lightly with 320 grit sandpaper and tack off dust. Deft and other lacquers literally melt into previous coats, thus you sand only to smooth surface imperfections.
- Repeat Steps 2 - 4 until you reach the desired build and depth.
- After the finish has cured (approximately 1 week), you can rub it out using standard methods.
|
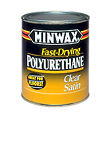
Finish #9: Brushing Polyurethane
| 
| Pros:
| Hard, durable, flexible finish
Several available levels of sheen (Gloss, Semi-Gloss, Satin)
Low maintenance
Generally polyurethanes have a slight amber color that gives
wood a warm glow (Subjective)
Many varieties
Widely available
|
| Cons:
| Requires better than average brush technique to avoid Drips/Runs/Sags and bubbles
Lengthy application time for large surfaces
Slow drying times (4 to 8 hours)
Dust Nibs!
Needs warm/clean environment
Moderate ventilation required
Finish may yellow more than expected
Plastic look/feel (subjective)
|
The two biggest problems with brushing varnish is fighting drips, runs, and sags, and secondly, avoiding dust nibs in the dried finish. Avoid sags and drips by orienting your work surface so that it is
horizontal. Brushing varnishes vertically is asking for trouble (sags and drips). Several magazines have published articles showing the masses how to sand, buff, and slice off nibs and other surface imperfections. My suggestion is to do everything in your power to avoid them in the first place. To accomplish this, you need to start with a clean surface and apply and cure the finish in a clean area. I setup a clean area (make-shift spray booth)
by stapling 1 mil 9 x 12 plastic sheet to the ceiling, allowing it to drop down to the floor forming three to four walls. This limits the contaminants that can enter the finishing/drying area. I place several fans with furnace filters at the open end of my make-shift spray booth to exhaust the airborne particles.
You can apply varnish with a brush using the following process:
- Prepare the surface to be finished.
- Knock the dust and crud out of your brush, especially new bristle and foam brushes. If using a new brush, pull on the bristles to remove any loose hairs.
- Stir finish before and during use. Never shake. You need to stir the semi-gloss and satin finishes during use to make sure the light-diffracting additives are evenly mixed. They tend to settle after a few minutes.
- Apply a thin coat of finish using a natural bristle brush (Black China Bristle, OX Hair) or foam brush. Do not overwork the brush stroke as it leads to bubbles. Most bubbles will disappear if the temperature is right, the material is not too thin, and if you have moderate air flow. An excess of bubbles is often caused by low temperature, excessively thinned varnish, too much air flow, or poor brush technique.
- Let dry 4-8 hours.
- Sand entire surface lightly with 320 grit sand-paper to remove surface imperfections and to ensure proper adhesion. Remove dust using tack rag or a rag moistened with mineral spirits or water.
- Apply additional coats until you reach desired build and depth. Sand surface lightly between each coat.
- After final coat, allow to cure 3 to 7 days. Apply paste wax and buff out using terry cloth towel. Or, after the finish has completely cured (1 to 2 weeks), you can rub it out using common rub out methods.
|
Finish #10: Brushing Oil Varnish
|
| Pros:
| Hard, durable, flexible finish
Several available levels of sheen (Gloss, Semi-Gloss, Satin)
Low maintenance
Oil varnishes generally have a slight amber color that gives
wood a warm glow (Subjective)
Widely available
Sherwin Williams and Zinsser produce oil varnishes that are
truly fast drying (1 hour or less)
|
| Cons:
| Requires better than average brush technique
to avoid Drips/Runs/Sags and bubbles
Lengthy application time for large surfaces
Most varnishes have slow drying times (4 to 8 hours)
Dust Nibs!
Needs warm/clean environment
Moderate ventilation required
Plastic look/feel (subjective)
|
I recently tried the (new to me) Sherwin Williams Fast Drying Oil Varnish. It appears clearer than Minwax Fast Drying Polyurethane and dries incredibly fast. Too fast for brushing if its thinned, and too fast for spraying with turbine (hot air) HVLP equipment. You apply oil varnishes in the same manner as Polyurethane varnishes.
|
Finish #11: Amana Hand-Rubbed Oil Varnish Finish
|
| Pros:
| Hard, durable, flexible finish
Hand-rubbed, satin sheen
Relatively easy, does not require tons of equipment
|
| Cons:
| Spraying varnish makes a mess of the finishing area
Often requires thinning which leads to drips/runs/sags
Slow drying times (4 to 8 hours)
Dust Nibs!
Some owner maintenance may be required
Needs warm/clean environment to properly cure
Lots of ventilation required
Finish may yellow more than expected
|
The October 1987 (Issue 19) issue of Wood Magazine published an article about the Amana hand-rubbed finish used by the Schanz Furniture and Refinishing Shop in the Amana colonies of Iowa. I have used the process many times with excellent results. You can order the process data sheet directly from the Schanz store (319)622-3529. You can apply the gloss and satin varnishes by brush or spray. The basic steps are:
- Sand surface through 100-grit sandpaper.
- Apply stain and allow to dry at least 24 hours.
- Apply varnish sanding sealer.
- Sand to 180 grit to remove runs and dust particles and to level the sanding sealer. Sand only enough to smooth the surface. Remove dust with a tack cloth.
- Apply gloss varnish, allow to dry for at least 24 hours.
- Lightly sand the gloss coat using 220-grit sandpaper. Remove sanding dust.
- Apply a second coat of gloss varnish and allow to dry.
- Lightly sand the second coat using 220-grit sandpaper.
- Apply a satin varnish top coat and allow to dry for about one week.
- Lightly sand the top coat with 320-grit sandpaper. Remove sanding dust.
- Rub surface with 0000-grade steel wool or Norton Bear-Tex pads or other abrasive pads. Apply uniform pressure, rubbing with the grain.
- Clean and buff the surface with lemon oil. Periodically reapply lemon oil to renew the finish.
|
Finish #12: Spraying Polyurethane and Oil Varnishes
| 
| Pros:
| Hard, durable, flexible finish
Several available levels of
sheen (Gloss, Semi-Gloss, Satin)
No bubbles
Low owner maintenance
Generally polyurethanes have a
slight amber color that gives wood a warm glow (Subjective)
Quick application time
|
| Cons:
| Spraying varnish makes a mess of the
finishing area
Often requires thinning which leads to drips/runs/sags
Slow drying times (4 to 8 hours)
Dust Nibs!
Needs warm/clean environment to properly cure
Lots of ventilation required
Finish may yellow more than expected
Plastic look/feel (subjective)
|
I have sprayed Polyurethane many times but I do not advise it unless you have a spray booth. Why the booth? Poly overspray does not dry before contact like lacquer. Consequently, it becomes a sticky hard to remove/clean mess on anything it lands on. Plus, if you have a furnace, gas clothes dryer, or other flame, it will burn the overspray that is floating in the air, gooing up the works in the process. Though not explosive like lacquer, it is flammable!
To avoid orange peel and to get the finish to level correctly, you may have to thin the varnish by 10 to 20 percent. The downside is that this can lead to drips/runs/sags on vertical surfaces. A few tips:
- Spray outdoors.
- If spraying indoors, build a permanent or temporary finishing area. I staple cheap 9' x 12' plastic sheets to the ceiling of my shop or garage to create a 3-1/2 wall spray booth. I have a sacrificial folding table to hold the work.
- Practice, Practice, Practice!
- Spray work pieces horizontally if at all possible to avoid sags and runs.
- Spray top surface and edges of door and place on drying rack to dry. Apply finish on the back surface with a brush when the top surface is dry.
- Buy several flood lamps and halogen work lamps on tri-pods. Arrange light so you can detect sags, drips, runs, orange peel, missed areas, etc.
|
Finish #13: Spraying Lacquer
|
| Pros: |
Beautiful hard finish
Fast drying (no dust nibs and multiple recoats in one day)
Low maintenance
May be rubbed out
Still the most popular "professional" finish |
| Cons: |
Obnoxious, toxic, flammable, explosive fumes
Must have ventilation, filters, and respirator
Requires spray equipment
|
Spraying lacquer is one of the easiest and most foolproof finishing methods but is irresponsible for homeshop finishers who do not have the proper ventilation. Nitro-Cell collects on walls, floors, ceilings and can ignite and explode at any time! I know several people who achieve good results spraying outdoors. For small work like jewelery boxes, I have had good luck using the Deft Spray Clear Finish. It is a bit pricey, but allows me to finish a box in one day (four coats). Other options include Target Coatings Oxford Prem Spray Lacquer. This is a water-based spray lacquer that performs like traditional lacquer. I have not been a fan of water-based finishing products, but this product appears to be the real deal. ML Campbell also sells water-based products that the pros use, but to my knowledge they only sell in large quantities.
- Prepare the surface to be finished.
- Apply toners and stains.
- Apply sanding sealer.
- Sand with 220-320 grit.
- Clean surface.
- Apply lacquer top coat.
- After approximately 30 minutes, sand with 220-320 grit. Clean surface.
- Repeat Steps 4 and 7 until desired depth is achieved (2 to 3 coats is generally sufficient.)
- Allow to cure for 1 week. Rub out.
|
Finish #14: Hand Applied Sikkens CETOL 1 — Martin Nystrand
| |
Martin Nystrand shared his favorite rub on finish. According to Martin...
Years ago my favorite finish for cherry was Watco oil. Along the way, a master woodworker warned me that over time, the cherry will turn purple (!), and the grain will turn murky. He was right. 15 years after using Watco on a beautiful figured cherry board, it is purple and murky.
My current preferred finish is Sikkens CETOL 1 (natural color 78) followed by Mylands Wax Polished applied with 0000 steel wool and buffed when the wax is dry. If desired, a coat or two of Sikkens CETOL 23 (natural color 78) can be applied over the application of CETOL 1 to offer protection against ultra wave light darkening of the cherry. Both CETOLs are normally used outside (especially for siding) so ventilation (or relatively brief use in a basement workshop, keeping the cover on the cans except when drawing fluids from the can, is recommended).
Results are luminous and dazzling, and application is easy: after sanding, I typically get away with one coat of CETOL 1 + wax and buffing. Great for large areas, e.g., 4' x 8' sheets of veneer plywood.
|
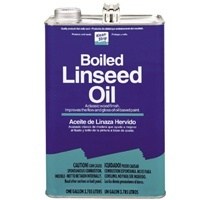 I have received tons of requests over the years for a boiled linseed oil (BLO) recipe. BLO is an inexpensive and easy to apply alternative to other rub-on oil finishes. Like other oil finishes, it soaks into the wood pores, leaving a shiny but not glossy surface that enhances the grain. Wood treated with BLO is resistant to denting and scratches are easily repaired, but the wood and oil surface is not as hard as varnish, and it slowly absorbs moisture if allowed to stay wet. I have received tons of requests over the years for a boiled linseed oil (BLO) recipe. BLO is an inexpensive and easy to apply alternative to other rub-on oil finishes. Like other oil finishes, it soaks into the wood pores, leaving a shiny but not glossy surface that enhances the grain. Wood treated with BLO is resistant to denting and scratches are easily repaired, but the wood and oil surface is not as hard as varnish, and it slowly absorbs moisture if allowed to stay wet.
You can apply BLO straight out of the can, but it will take several days to dry and weeks to fully cure, even with its added "driers". Since you need to apply 4 to 5 coats or more to build a protective and deep finish, speed up the process by adding turpentine or mineral spirits as an additional drier and to thin the BLO. Adding varnish and/or beeswax adds more depth and protection. Mix the recipes a day or so in advance to applying it.
The most common boiled linseed oil (BLO) based recipes are as follows:
- 1 part BLO + 1 part raw Tung Oil (not Waterlox, Dalys, or other tung oils containing resin additives) + 1 part Semi-Gloss urethene varnish (This is the Sam Maloof finish recipe)
- 1 part BLO + 1 part Turpentine
- 1 part BLO + 1 part Turpentine + 1 part varnish
- 2 to 3 parts BLO + 1 part Turpentine
- 1 part BLO + 1 part Turpentine + 1 part Beeswax (mixed over electric element outdoors)
- 2 to 3 parts BLO + 1 part Turpentine + 3 parts Beeswax (mixed over electric element outdoors)
- 2 parts BLO + 1 part Mineral Spirits + 2 to 3 parts Beeswax (mixed over electric element outdoors)
- 1 part BLO + 3 parts blond shellac + 2 parts polyurethene
Apply the BLO recipe as you would other oil finishes. I flood the surface, allow the recipe to soak in for a few minutes, then wipe off. You can also sand the flooded surface with fine sandpaper before wiping off the excess finish. This helps smooth the surface by knocking off microscopic fibers. Some say it fills the pores--I disagree to large extent. Again, to achieve a protective, durable finish with depth, you will need many coats.
Is there a downside to BLO finishes? Yes. Unless you select a recipe that includes varnish, you will find it necessary to reapply the finish--it will dry out. There used to be a saying that is not far from the truth in regareds to BLO finishes: Apply every hour for a day, every day for a week, every week for a month, every month for a year, and every year for the rest of your life! This is why I tend to include varnish in my recipes, or go with a finish like Waterlox Tung Oil Products. I like Waterlox because it includes tung oil, resins, and the thinner already mixed. The resins provide the additional durability and protection that makes recoating unnecessary in most applications.
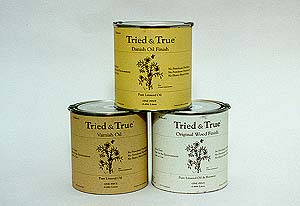 The Tried and True line of finishes, though not new, are getting lots of press as of late. I have not used them but defer to the experiences of many who claim they are truly excellent finishes. The Tried and True products are made from Polymerized Linseed Oil and are applied by hand. The consistency is rather thick and I have read they require a high level of effort (elbow grease) to apply. The products are claimed to be environmentally safe, solvent free - zero VOC, food safe, and contain no heavy metal driers. The Tried and True line of finishes, though not new, are getting lots of press as of late. I have not used them but defer to the experiences of many who claim they are truly excellent finishes. The Tried and True products are made from Polymerized Linseed Oil and are applied by hand. The consistency is rather thick and I have read they require a high level of effort (elbow grease) to apply. The products are claimed to be environmentally safe, solvent free - zero VOC, food safe, and contain no heavy metal driers.
Here is a marketing blurb from Tried and True:
Tried & True Wood Finishes has combined some new and some old ideas to create the best oil finishes made. We use 18th century varnishmaking techniques and the best natural ingredients to make environmentally safe wood finishes that make no compromise for beauty, durability,or safety. Our products are easy and economical to use. Remember: A little bit goes a long way!
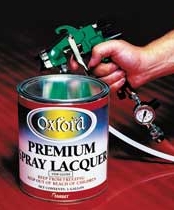 Target Coatings. Target Coatings is also receiveing rave reviews from pros and homeshop users alike. They offer an expanding line of water-based spray finishes that perform like their traditional solvent-based counterparts. Target Coatings. Target Coatings is also receiveing rave reviews from pros and homeshop users alike. They offer an expanding line of water-based spray finishes that perform like their traditional solvent-based counterparts.
Their Oxford Spray Lacquer (again, water-based), performs like traditional lacquer. It burns-in, dries quickly, and provides a hard, clear finish. Target Coatings claims that their Oxford Premium Spray Lacquer out performs conventional nitro-lacquers and CAB Acrylic systems without the environmental and safety issues associated with solvent based products.
A couple things I have learned about water-based finishes that also apply to the Oxford Premium Spray product: 1) They work best at room temperature with low humidity (tend to blush if humidity is > 75%) and 2) Never use stearated sandpaper between coats!
Here are some hints in regards to preparing surfaces for stain and topcoats:
- The surface must be clean, dry, and free of any dust, wax, or grease before staining.
- Bare wood should be sanded smooth and free of blemishes.
- Hand-sand with the grain following machine sanding, and on flat surfaces use a sanding block
- If saw, router, planer, or molder marks are visible, begin with a coarse paper (80-100 grit). Otherwise start with a medium grit (120-150) and finish with a finer grit (180, 220, 320). Surfaces sanded with finer sandpaper will result in slightly lighter tones when stained; using coarser paper will result in darker colors.
- Just before applying the first finish coat, clean the surface:
- Vacuum surface using brush attachment.
- Use compressed air to blow off surface.
- Pass over surface with a tack rag or rag moistened with mineral spirits.
- Just before applying subsequent finish coats, clean the surface:
- Vacuum surface using brush attachment.
- Pass over surface with a rag moistened with water. Dry with clean shop paper towels.
Smoothing Out a Polyurethane Finish
After each coat of polyurethane, you should knock down the inevitable dust nibs with 220-320 sandpaper. After your final coat, you will still have some dust nibs unless you're lucky and/or have a very clean finishing area. You can smooth the final coat surface using #0000 steel wool and some kind of lubricant. I generally use TreWax or Johnsons paste wax. After smoothing the surface with paste wax, I "rubout" the finish using a thick terrycloth towel and lots of elbow grease.
There are other techniques for removing the final coat's dust nibs including shaving them off with a razor blade, using 1500-2000 grit wet/dry sandpaper using water as the lubricant, etc. However, if you plan to rubout poly using any of these methods, it is critical that you use gloss if you want to achieve any degree of sheen because the rubout stages will diminish the level of sheen. However, if done correctly, rubbing out a finish should not affect the clarity and perhaps enhance it. Popular Woodworking published a good article on this subject (Popular Woodworking, Issue #107, March 1999, Page 34).
Hardwood Plywood Fuzz and Fibers
Matthew M wrote:
I spray finished a cabinet that is made from solid oak face frames and oak plywood sides and back. The solid areas finished smooth with few nibs. The plywood areas seemed to sprout dust and lint from every pore. Before I apply another coat, I'll need to sand all the plywood areas thoroughly. What can be done to these areas to prevent this from happening? It doesn't happen on subsequent coats, so should I be sealing the plywood before the first coat? Any help you can offer will be appreciated.
Our reply:
Been there, done that! Indeed hardwood veneer plywood will sprout fuzz as you mentioned, especially if you are applying a "water-based" finish. There are a couple of fixes:
- In the past, we would spray a light coat of distilled water on the plywood surface and sand down the raised fibers. However, unless you are working with high quality plywood with a thick veneer, we can no longer do this without risking sanding through the veneer. I have seen veneer lately less than .010" thick.
- Apply a sealer coat. Once dry, lightly sand / steel wool it then wipe the surface with tack cloth and with a correctly positioned light, look for instances of raised grain and lightly sand them smooth. Most finish manufacturers offer sealer for their top coats. If not, use shellac, or a thinned mix of your top coat as the sealer.
By the way, in woodworking, sealer/primer coats are recommended for most projects, and for several reasons including fixing fuzz! Regarding your project, you should be okay, just sand down the fuzz and apply another coat of finish.
Finishing Articles
Common Staining Problems
Certain woods like soft pine, maple, and birch often absorb stains unevenly. To help overcome this problem on soft woods and end grains, first apply a coat of Gel Varnish, wipe it nearly dry, arid then follow immediately with a coat of gel stain. In this case, the varnish acts as a conditioner and eliminates much of the blotchiness. A second or third coat of stain may be necessary to get the desired color. On the hardest woods, using a medium grit (120-150) rather than very fine paper before staining usually obtains even results. For the most difficult woods to stain, dampen the wood surface with water from an atomizer and allow it to dry for one to two hours. Then sand lightly, without polishing the surface, and stain. Remember, always test-stain a hidden area before proceeding with the entire piece.
Troubleshooting Guide for Spraying Water-Based Finishes
I stole some of this from another web site...don't remember where...I have tried three water-based finishes: Amity, Hydrocote, and Crystalac. None have performed like I expected. I am not saying that they are bad finishes, simply that with my equipment (professional HVLP), environmental conditions, and so forth, these finishes did not provide satisfactory results. I understand that pro cabinet shops are using a number of water-based finishes including ML Campbell and Sherwin Williams products. However, they can control the humidity and temperature which are pre-requisite to using water-based finishes. I have read that the Oxford product line provides an excellent water-based system. I plan to try it sometime in the future. Here is the troubleshooting guide.....
- Rough, dry surface. This is called dry spray. You may have sprayed too lightly. Re-sand the finish with #320 paper and apply a heavier coat. Keep your gun at 6-8" from the surface.
- Dimples in the finish. This is called orange peel, caused by spraying in temperatures that are too cool. Cooler temperatures will adversely affect how the finish will level and harden. Water base finishes must be applied at temperatures above 65 F. If it is cold enough to wear a sweater it is too cold to apply a water base finish. The surface of the wood must also be warm. If you turn the heat on when you enter your shop in the morning, the air heats up quickly but your furniture will still be cold for some time. Check the surface to see if it is warm. Also, check the temperature of the finish. Warming cold finish by setting the can next to a heater or setting the container in some hot water for 5 minutes will improve the ease of application.
- Larger dimples are called "fish-eyes" or "craters". Cool temperatures can cause these, but the more likely source is contamination of the finish with either wax or silicone.
- Blush. Blush is the term for a cloudy, milky appearance in the finish, has two causes. The most common reason is incompatible stain. For example, using a water base top coat over a heavy oil base stain. When the top coat is applied, the oil in the stain seeps up through the finish and reacts with the acrylic causing a chemical blush. To prevent this, use a quick drying water based stain. If you choose to use oil base stain, seal the stain with a coat of shellac or lacquer sealer. This will provide a barrier between the oil and the acrylic. Proper drying time between the oil stain and finish coats is essential!
- Another common cause for blushing is high humidity. Spraying water base finish in humidity of over 75% may cause blushing because moisture becomes trapped beneath the finish and cannot evaporate. You can prevent this condition by increasing air movement in the finishing area with a fan. All water needs to evaporate is sufficient air movement. You can also improve drying conditions by increasing the temperature in the drying area.
- Surface is not leveling out. In hot temperatures (85F - 100F) the finish may dry too fast. Use EF Extender to open (increase) the dry time. Finishes that dry too fast may not completely level out before all the water evaporates from the finish. Remember that high humidity can cause the finishes to take longer to dry but will not harm the final finish.
- Air Bubbles / Air Entrapment. This symptom is often associated with the previous topic, not leveling out. One of the most common and vexing problems with water-based products are the air bubbles. Any fast-drying product tends to have problems with air bubbles, but air bubbles are more inherent to water-based products because of the way they interact with the pores of the wood, literally forcing air/gas to escape. Allowing or causing the finish to dry too fast or allowing air movement during the initial drying process is the most common cause of air bubbles--the finish just does not have enough time to flow and level before it sets up. The following are a few time-honored “air bubble” remedies that I have compiled from my experiences and others..
- Prevent drafts or moving air during wet film setup, at least until the finish has leveled out. In the case of water-based finishes, give it an hour and then ventilate the work area.
- Control your Air temp & Humidity. Follow the manufacturer's recommendations.
- Experiment with different film thicknesses.
- Do not sand with stearated sand paper and make sure the surface is properly prepared.
- Experiment with your spray gun settings.
- Don't use HVLP turbine type spraying units, as they tend to warm the air and cause the finish to dry too quickly. Use HVLP conversion guns, or conventional sprayers
- Depending on the product, thin the finish with water--start at 10% and add more if needed. Some products suggest you use their retarder. Best to follow manufacturer recommendations.
- Lightly dampen the surface, with a sponge or a water bottle sprayer. The water will travel through the film keeping it wet longer, so the bubbles have more time to break.
- One other consideration when using water-based products that can cause surface problems-Never use stearated sandpaper between coats!
Make-Shift Spray Booth
I look forward to the day when I have enough sense (cents?) and space to setup a proper spray booth. A good spray booth should have at least three sides, explosion-proof ventilation that exhausts airborne particles through large surface filters, proper lighting, and so forth. Unfortunately, I have to make do with my make-shift spray booth.
I setup my make-shift spray booth by stapling 1 mil, 9 x 12, plastic sheets to the ceiling of my shop or garage, allowing the plastic to drop down to the floor. I use the plastic to form three to four walls. This limits the contaminants that can enter the finishing/drying area. I have contemplated using a shower curtain arrangement, or stapling the sheets to furring strips, which I could screw to the ceiling and reuse. But the current system works well enough and costs almost nothing. I place several house fans, protected with furnace filters, at the open end of the spray booth to exhaust at least some of the airborne particles.
I have a sacrificial banquet table with folding legs that I use to get the work piece off of the floor. I have a variety of lazy susans and blocks of wood with protruding finishing nails that I use to raise work pieces off of the table surface. I use a variety of incandescent, fluorescent, and halogen work lamps to provide lighting. The system works pretty good. It's not perfect, but is adequate. Of course I cannot spray highly volatile finishes like lacquer and I wear protective clothing and I breathe through a dual filter respirator.
Butcher Block Finishes
I received numerous questions regarding finishing butcher blocks. Most of us are concerned about whether a finish is safe or not for food preparation. Most finishes (Polyurethane, Danish Oils, Salad Bowl Finishes, etc.) include dryers that are potentially dangerous (i.e. may cause cancer). However, once these finish have cured, they appear to be safe. There are alternatives. The following are a few finishes typically recommended for butcher blocks:
Finish 1: Polyurethane, 2-Part Urethanes, Conversion Varnishes
You can brush on two - three coats of oil-based polyurethane and it will look good and resist water. Of course 2-part urethanes and conversion varnishes are probably better, but must be mixed and require spray equipment. If the top is to be used for food preparation (cutting, lots of water, etc.), no surface finish will hold up. The knife cut marks will scar the surface, water will enter, and after awhile it will lose its fine finish look.
Finish 2: Tried and True Varnish
This varnish (and their oils) penetrate and are completely safe to use. They have been around awhile, but have just recently entered the lime light so to speak.
Finish 3: Mineral Oil
The safest oil to use to condition butcher-blocks and cutting boards is mineral oil. It's safe, effective and non-toxic, and unlike the vegetable oils, there's no chance it will turn rancid. A couple of mineral oil-based finishes exist. Drench the board several times. One trick I have read about is to drench it several times, sand it wet, drench it, and iron (yes) iron the top. See Links Below.
Finish 4: Nothing
The FDA suggests you use nothing. Raw wood provides one of the best food preparation surfaces known to man.
Links:
Finishing Guitar Fretboards
The correct finish (if there is such a thing) for guitar fretboards depends in part on the type of wood used for the fretboard:
- Generally solid hard (hard rock) maple fretboards are finished with a catalyzed lacquer or urethane varnish. However, the constant fingering, fretting, and string abrasion will wear through any such surface finish. Consequently, guitar builders/luthiers often recommend a simple oil finish such as tung oil or pure lemon oil.
- Rosewood and ebony fingerboards are often left unfinished. Several guitar builders I have contacted suggest that the fretboard be sanded to at least 2000 grit and then finished with a hard paste wax. Others recommended a special fretboard oil or pure lemon oil.
"Mark K from Anchorage" provided the following comments and advice regarding guitar finish maintenance:
I was visiting your website "Homesite Finishes That Work" and found it very interesting. One area that I enjoyed reading was about "Guitar Necks."
While I don't have a maple neck guitar, I do have a couple of rosewood fretboard guitars and one ebony fretboard guitar. When I clean them, it is for a variety of reasons. I first use some 000 steel wool and clean both sides of the fret wire. I then use the same steel wool on the neck. Most necks have sort of radius and I don't worry about that. After I have used the steel wool on the fret wires and on the wood, I use a clean rag and use some "'Liquid Gold" liquid on the necks. I usually let that set overnight to let it soak in. I'll wipe off the necks the following day and rub the fretboards with a dry cloth. This "Liquid Gold" works well and doesn't feel oily. It keeps the wood in good shape and I don't have to worry about guitar case humidifiers like some guitar fanatics do. This "Liquid Gold" penetrates the wood and I never have to worry about guitar neck bowing and warping. This has worked fine for me over the years and I recommend it.
Mark K
From the Wechter Guitar web site:
We use linseed oil on the bridge, applied very sparingly with a Q-tip, then rubbed off with a rag. You really only need to do it when you want to clean the bridge and give it a little shine; the wood does not require oil, that is, it does not have to have oil restored to it.
We use the same technique on the fingerboard, mostly just to clean off grime and give the fingerboard a little smoother feel. I've used lemon oil too, but I don't think it lasts as well, though it smells nice and works fine too.
Too much oil will gunk up the strings, so be sure you wipe it off well. You can oil the fingerboard and bridge as often as you like as long as you wipe the wood very well to get the excess off. If you never do it at all the only harm done is that the wood will start looking dull and will accumulate dirt. This does not harm the wood in any way. You probably want to wipe a little oil on the fingerboard and bridge a few times a year just to keep the bridge looking good, and to keep the fingerboard feeling smooth.
What the bridge and fingerboard really need is the proper moisture content- this is what you have to make sure of! We recommend about 50% to 55% relative humidity.
Finishes the Pros Use
I will flush this out sometime in more detail...
- Complete Finishing Systems (Sherwin Williams, ML Campbell)
- Lacquer
- Catalyzed Oil Varnish
- Water-based Lacquer and Varnish
- Rubbed Oil Finishes
- Polyurethane
- Shellac
Equipment the Pros Use
I will flush this out sometime in more detail...
- High Pressure Low Volume spray guns
- High Volume Low Pressure spray guns - mated to conventional air compressors
- Ventilation
- Filters
- Respirators (static and fresh-air)
- Dedicated Finishing rooms with Environmental Controls
- Turntables
- Drying Racks
Topcoats over Shellac
A number of people have asked me about applying topcoats (varnish, polyurethane, lacquer, etc.) over shellac. The manufacturers of most clear finishes discourage using their products over shellac. However, the term shellac in such warnings typically refers to natural (waxy) shellac, not dewaxed shellac. In most cases, dewaxed shellac makes for a near perfect sealer or base coat for topcoat finishes such as varnish, polyurethane, and lacquer.
Until recently, it was necessary to mix your own dewaxed shellac from flakes and alcohol. However, Zinsser has recently introduced their SealCoat® Universal Sanding Sealer, which is a solution of 100% wax-free shellac in denatured alcohol. Formulated using a patented shellac process, SealCoat is guaranteed to be compatible over and under all clear finishes and guaranteed to remain fresh and dry to a hard film for at least 3 years after the date of manufacture.
However, always test your finishing components (stains, base / sealer coats, toners, top coats, and polishing compounds/waxes) for compatibility.
A few web sites offering shellac:
Homestead
Finishing Site
Zinsser Products
Shellac Superstore
Helpful Finishing Links
Glossary
I stole this glossary and formatted in HTML:
- Atomization
- The breaking up of finish particles through the tip of an air gun
under pressure. A fine mist is created that lands on the surface and
levels out to a smooth finish.
- Binder
- Finish or resin added to the stain, used to lock the pigment and
dyes into the wood.
- Blush
- Cloudy haze in finish caused by moisture trapped beneath the surface.
High humidity is the most common cause. Can be also caused by the
improper application of an oil base stain under a water base finish.
- Coalescing
- The evaporation of the chemicals that keep the acrylic resin in
a liquid form. Once this process is complete, the acrylic forms a
hard finish film.
- Crazing
- Tiny cracks in the finish film, usually along the edges of a surface.
Caused by the finish drying too fast in high temperatures.
- Extender
- Chemical additive used to control the drying and flow of water base
finishes. Can be used with stains and finishes to "extend"
the open time.
- Fish Eyes
- Defects in the finish film caused by surface contamination (usually
from oils, silicones, and waxes.)
- Gloss
- The amount of light reflected off the finish surface. High gloss
is rated 80-90°. Semi gloss is rated 50-75° . Satin is rated 30-45°.
Rubbed effect is rated 20-25°. Flat sheen is rated 5-15°.
- Grain Raising
- Tiny fibers in the wood grain that lift when exposed to water. Easily
controlled with proper sanding.
- HVLP (High Volume Low Pressure)
- An HVLP spray unit consists of a turbine motor that produces warm,
low-pressure air. Its high transfer efficiency increases the square
foot coverage.
- Orange Peel
- Defect in finish film usually caused by cool drying temperatures
or improper fluid tip size. The finish looks like the surface of an
orange.
- Pinholes
- Small defects in finish film caused by surface contamination. Resembles
tiny holes in the finish.
- Resin
- The material that forms a hard film on the surface after the chemicals
have evaporated. Acrylics and urethanes are the common resins used
in water base finishes.
- Satin
- Finish that has had the gloss reduced to provide a softer sheen.
A flattening agent made from fumed silica reduces the amount of light
reflected by the surface.
- Stain
- A liquid mixture to color wood. Made of 4 parts: Vehicle (water
or solvent), Colorant (pigments and dyes), Binder (resin), Additives
(solvents to control drying).
- Viscosity
- The thickness of a fluid. This is used to determine flow rates for
spray application. Usually measured with a #2 Zahn cup or #4 Ford
cup. Viscosity can be decreased by using the appropriate thinner.
Comments / Questions
Was this article helpful? Do you have any questions? E-Mail Us! We would love to hear from you!

|

