|
|
|
|
Page Directory
IntroductionSite Directory
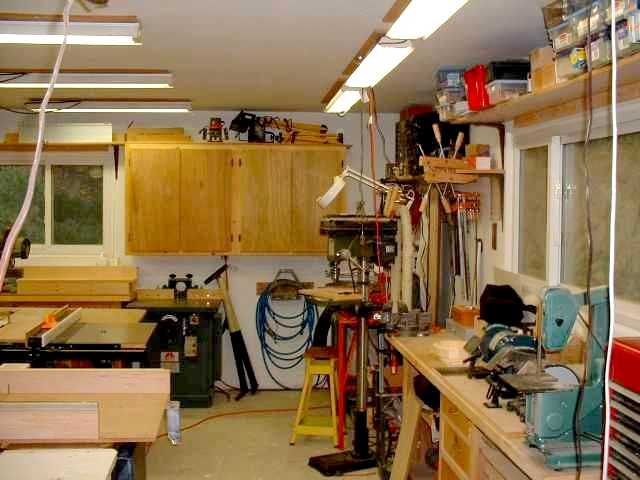
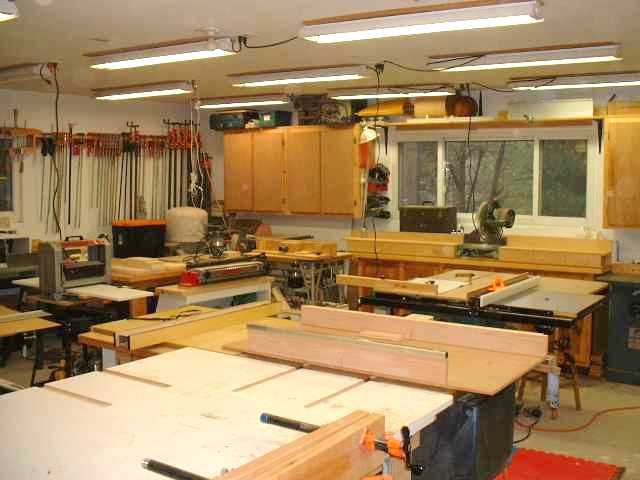
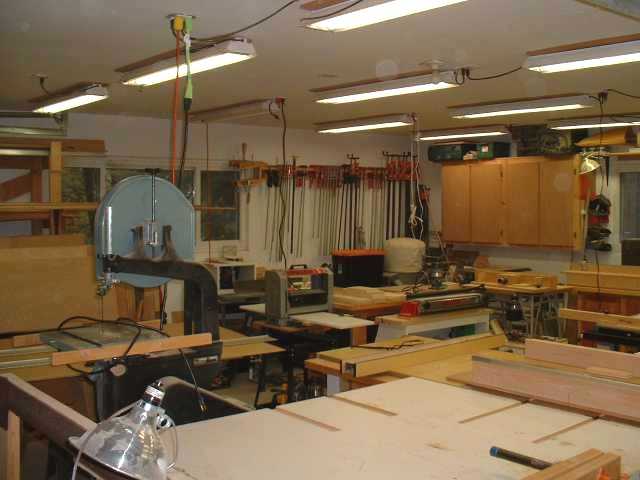
HomeA number of years ago I decided to build a standalone shop behind the house. Our city has a limit on the size of out buildings, thus I built it to the largest possible size: 25' x 25'. After moving my tools from the basement and garage I immediately wished I had more room, especially for finishing. Since we build lots of large projects, we need lots of space for assembly and storage of components.
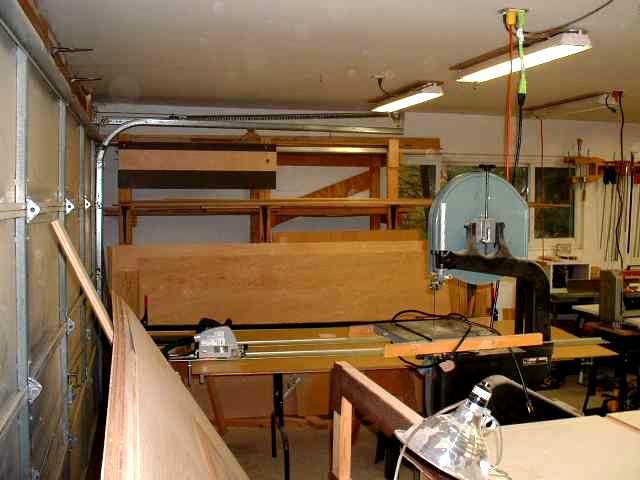
I also planned the location of my primary table saw (the PM66) so I could rip boards up to 12' in length. Of course, this requires that I open the front door for the out feed of pieces longer than 10'. I purposely put the Grizzly on wheels (ShopFox Base) so that I can move it outside when ripping longer pieces (for kayaks, etc.).
I also planned for lots of lighting, both natural and florescent. I have three large windows on the west, north, and south walls. On sunny days, they provide lots of light. I installed and wired 18, two tube, florescent fixtures on three separate switchable circuits.
In regards to electricity, my Father and I wired a 60 AMP breaker with service drawn from the house. We installed two 240 VAC circuits and 6-8 120 VAC circuits. We wired three GFI protected circuits for general usage. We mounted the outlets for the circuits in the ceiling. I can reach them fine, but no one else can. I have since made a few pigtails that hang from the ceiling to make the outlets more accessible to humans of average height.
I insulated the walls and ceilings for the heating/cooling aspect and also to drown out some of the machine noise. My father and I completely drywalled the shop, walls and ceiling. It was a hassle, because the builder did not pay attention to the standard 16" on center between wall studs and 24" on center between ceiling joists. Thus, we literally had to cut and trim virtually every piece of wall board.
I installed a natural gas direct vent furnace from Williams Furnace Corporation. It is a built-in wall furnace. Being a direct vent and sealed furnace, the combustion air is brought in from the outside. Consequently, the furnace is safe from the dust and vapors that occur in our shop. The unit is rated as follows:
Input: 31,000 BTUs
Output: 21,000 BTUs
The furnace warms up shop in the winter in an hour or so. I generally turn its thermostat (0 to 5) to 0 in the evening when leaving and turn it to 4 or 5 in the morning to warm up the shop. Once the shop is warm, I turn it down to 2 or 3 depending on the outside temp. The unit does not require a fan/blower, although you can purchase one as an option. You can also purchase a thermostat for the unit. I have not purchased either option.
Williams Garage Direct Vent CatalogYou can contact Williams Furnace at:
Williams Furnace
225 Acacia Street
Colton, CA 92324
TEL: (909) 825-0993
FAX: (909) 824-8009
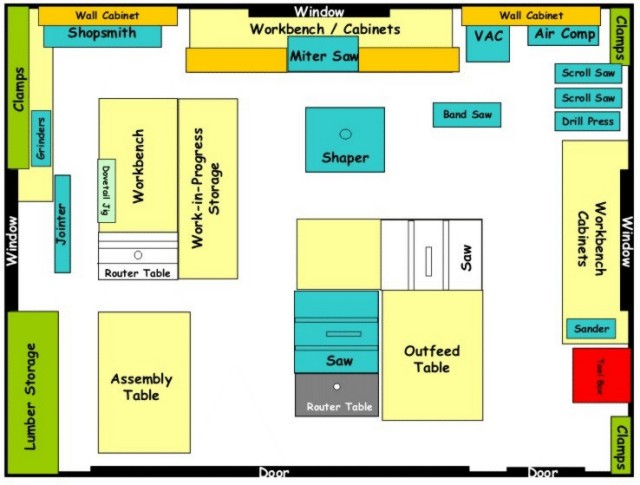
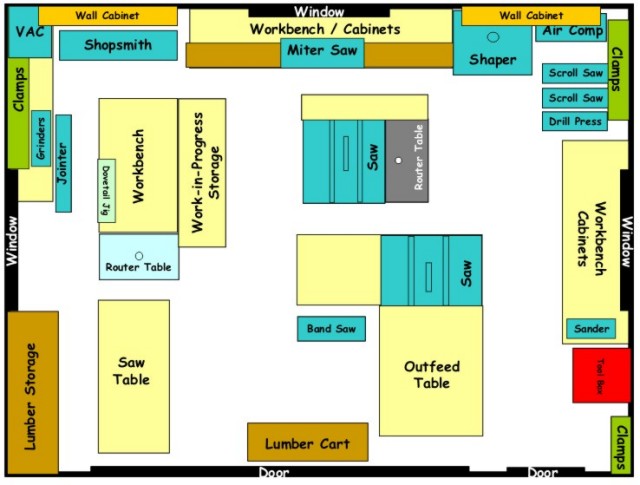
I don't have many tips regarding shop layout--frankly my layout is only so-so. But here they are...
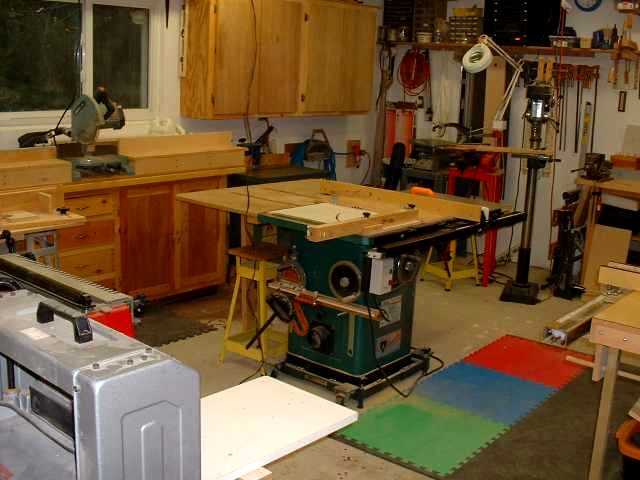
I have received a number of emails regarding the need for two table saws. Obviously, two table saws is a luxury, here is my justification (not that any tool purchase be justified):
I can go on and on, but suffice it to say that I have had the luxury of two table saws for about 10+ years and have gotten used to having them. After selling my Craftsman (the second saw) a number of years ago I relied on the Powermatic and the Shopsmith and continually cursed the day I got rid of the Craftsman. Before buying the Grizzly I had not intended on buying a cabinet saw. But didn't find an acceptable used saw, and after getting spoiled by the Powermatic, I decided I probably would not be satisfied with a lesser saw.
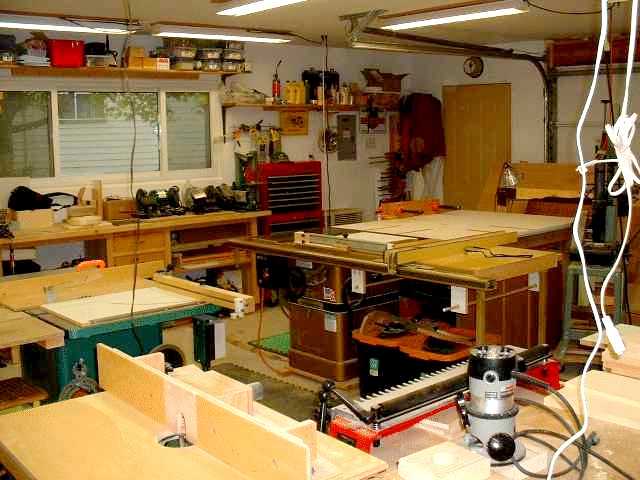
I got the idea for my layout of the two saws from a local mill shop. They had a PM66 and Delta Unisaw, back to back, separated by a large outfeed table. I spent some time observing their operations and quickly saw the advantage of dedicating one saw for ripping and fine crosscuts, and another saw for crosscutting, dado operations, and so forth. However, I decided placing the saws back to back was not the most convenient setup for my shop, so I put them at right angles. Generally I like the setup, but it will have to change if I purchase the sliding table arrangement. I'll cross that bridge when I get to it.
Was this article helpful? Do you have any questions, E-Mail Us! We would love to hear from you!