Diary: Building the 14-foot Wood and Canvas Kayak Model
Friday June 8, 2001 - Getting Started (Six hours, including filming/photography time)
Ordered the canvas from Mauritzon. The price has gone up from $4.00 to $6.00/yd.
Rolled the Grizzly 1023S outside and made and attached an outfeed table to it.
Ripped the keel and strakes from a 3/4" x 12" x 14' piece of clear poplar. I have not used poplar for a kayak but it was cheaper than clear pine by about $20.00. I ripped the keel to 1-3/4" wide, rather than the 1-1/2" called in the plans hoping it will be that much stronger.
You need 12 strakes (11 strakes, and cockpit stiffener "H")
Transfered the bow/stern and rib patterns to the #2 construction pine. I glued the paper patterns onto 1/4 luan plywood to simplify tracing.
Cut out the bow/stern pieces and the rib components. I built a small cross cut jig for truing up the rib pieces. Many of the pieces have parallel sides so I figured I would cut them out rough using the jig
saw and trim the using the table saw. Worked pretty well. Normally, I simply cut them out using the jig saw, double-tape
them together, and sand to the line using our disk sander.
Saturday, June 9, 2001 - The Ribs and Frame (Six hours, including filming time)
Began the day by pocket-hole drilling and assembling the rib pieces. Ruined one rib component and had to remachine it. I used Titebond II to glue the rib pieces together. A waterproof glue/epoxy should be used, but I'm lazy and cheap.
Attached the bow and stern to the keel using glue and 2-1/2" drywall screws.
Dadoed the keel for the ribs, and attached the ribs to the keel using glue and 2-1/2" drywall screws. I strayed from the plans in regards to the rib locations on the keel. I placed ribs 2 and 4 40" apart, placed rib 4 (2nd rib from stern) 20" from center and placed rib 2 (2nd rib from bow) 19-1/4" from center.
Machined and resawed the keel cutoff to produce four pieces of poplar (3/8" x 1-3/4 x 10") from the keel cutoff. I
attached these pieces to the sides of each end of the keel to provide a pseudo mortise for the bow/stern pieces. I attached them using glue and brads.
Attached the upper strake from the bow to the stern using glue and 1-5/8" drywall screws. I attached the upper strake to each rib (excepting the center rib) using glue and 1-5/8" drywall screws. It takes some effort and time to ensure the upper strake is straight. I never get this perfect. The problem is that the ribs, though dadoed and screwed into the keel, still want to rotate a bit. Plus, the strake material, by design, is rather flexible. Consequently, keeping it perfectly straight, end to end, is almost impossible.
Tuesday, June 12, 2001 - Assembling the Frame (1 hour, including filming time)
Had about one hour free so Luzimar and I dragged the Kayak frame and tools out of the shop and
attached the D and E strakes. This requires the following steps:
Mark the center of the strake, length-wise.
Pre-Drill and Countersink for the 1-1/4" drywall screw at the center line.
Dab some Liquid Nails adhesive at the center rib at the "Strake D" position and
screw the strake to that location. Again, we use 1-1/4" drywall screws at each position.
Dab some Liquid Nails adhesive at the rib #2 at the "Strake D" position, pre-drill/countersink, and
screw the strake to that location.
Dab some Liquid Nails adhesive at the rib #4 at the "Strake D" position, pre-drill/countersink, and
screw the strake to that location.
Dab some Liquid Nails adhesive at the rib #1 at the "Strake D" position, pre-drill/countersink, and
screw the strake to that location.
Dab some Liquid Nails adhesive at the rib #5 at the "Strake D" position, pre-drill/countersink, and
screw the strake to that location.
Mark a line at each end of the strake where it meets the end of the bow/stern pieces.
Mark an angled line across each end of the strake, parallel with the bow/stern. This
miter allows the strake to lie flush with the face of the bow/stern when it is screwed in place.
Use a handsaw to cut the miter at each end of the strake.
Pre-drill/countersink, dab a liberal amount of Liquid Nails on the mitered edge of the strake, and
screw it down so that it lies flush against the bow/stern face.
Figure 1. Assembling the Frame (Press F5-Refresh to Restart the Animation)
Saturday, June 16, 2001 - Completed the Frame (6 hours, including filming time)
I finished attaching all of the strakes, including the cockpit stiffener "H".
I added the filler pieces between the C, D, and E strakes at ribs 2 and 4. Since the filler pieces must conform
to the rounded form of the ribs, I kerf the bottom of the filler pieces to bend.
I rounded over the strake corners using a block plane and sander and I sanded all sharp edges. You want to do this
to make sure they don't rip the canvas when your applying the canvas.
Monday, June 18, 2001 - Painted the Frame (1 hour)
I sprayed a thick coat of latex-enamel exterior primer on the frame. I use an inexpensive Wagner sprayer. You can do
it with a brush, but it is a real pain! I will put on a second coat on Thursday.
Wednesday, June 20, 2001 - Painted the Frame (1 hour)
I sprayed a second coat of latex-enamel exterior primer on the frame.
Friday, June 22, 2001 - Applied the Canvas (5 hours)
For buoyancy, if the kayak fills with water, you should add some flotation modules to the bow and stern. You can purchase them
for about $35 a set (you need two sets). Or you can make your own. Simply fill a couple of trash bags with styrofoam peanuts
and stuff the bags in the bow and stern. This time around, I purchased a 4' x 8' sheet of foam insulation at Home Depot for $4.00 and
we broke it up and stuffed into four trash bags, two bags for the bow, two bags for the stern. You can also purchase closed-cell foam
insulation and cut it to fit between the strakes ala Paul Lambert--looks great but it is too much work for my liking.
We installed the canvas in about four hours. Luzimar and I installed the canvas alone for our previous kayak. This time,
both Eber and Olesea helped. Eber stretched the canvas, Olesea steadied the kayak frame, and I stapled and glued. All
overlapping canvas edges should be glued using Liquid Nails. I started with 6 yards of canvas (60" wide) and had quite a bit left over. When you have finished, you will have
attached seven pieces of canvas (the bottom, four top panels, and two cockpit side panels). Here are the steps:
Lay the canvas out on floor/ground and mark a center line for its entire length.
Lay the kayak upside down on a table or a couple of saw horses. If you do not have someone to steady the frame, you
must clamp it down.
Lay the canvas over the kayak frame. Center the canvas over the keel, using your marked line as the reference.
With the canvas extending more or less six inches over the bow (and approximately 3 feet over the stern), use one
staple to secure the canvas at the bow. Place the staple about midway along the bow curve.
Stretch the canvas tight along the keel and staple it to the stern, about midway along the bow curve.
At this point, you should have only two staples securing the canvas tight across the keel.
Now, begin stapling the canvas to the D and E strakes. Do not staple the canvas to any other strakes. Start on the
D strake with the canvas pulled tight, center line centered on the keel, place one staple near the middle of the strake. Place additional
staples approximately 10" to the left and right of the middle staple. Move to the other side of the frame and perform the same'
procedure, stapling the canvas to the E strake. Move left and right, side to side until you reach the bow and stern.
Cut off the excess canvas extending beyond the stern. You will use this 20" of this material for the two cockpit side pieces.
Carefully cut off the excess canvas (usually two pieces, left and right) at strakes D and E. You will use this canvas for the four top panels.
At the bow and stern, you must slit the canvas to make the neat fold around the bow/stern frame members. Use plenty of
liquid nails inside the overlaps. Fold and staple as neatly as possible.
Turn the kayak over to canvas the top. The top is canvased using four panels cut from the two left over pieces cut from
strakes D and E. Take one of the two top panel cutoffs and cut it at its center creating two pieces. Repeat with the other cutoff. You
should end up with four mirror images of panels that are in the shape of a triangle, more or less.
Canvas one end at a time. We started with the bow. Starting at the leading edge of the bow, staple the finished edge of
the narrow end of panel 1 to strake D, leaving a few inches of material extending past the front of the bow. Run a bead of Liquid Nails from the bow towards the center of the boat, along Strake D for
about 18". Stretch and staple Panel 1 along Strake D. Run another bead of Liquid Nails and repeat stretching and stapling
until you reach the wide end of Panel 1.
Stretch and staple Panel 1 to the center strake, strake C. Staple Panel 1 to the inside of the cockpit, but not to the
outside of Rib 2. The fewer visible staples the better. You need to slit Panel 1 at the front corner of the cockpit. Trim
the excess canvas. Staple the canvas to the underside of Strakes H and F.
Trim and staple Panel 1 at the bow.
Now attach Panel 2. Run a bead of glue along the strake C. Staple the front finished edge of Panel 2 to strake E. Unlike Panel 1
where we stapled along the D strake until the end of the canvas, you must alternate stapling Panel 2 to Strake E and C. Othewise,
you will have a significant wrinkle and soft spot to fix when you reach the cockpit area. Thus, alternate stretching and stapling
Panel 2 to the E and C strakes, rolling the material over along the C strake so the unfinished edge is not exposed. Trim
excess canvas as you go.
Slit and neatly fold the material at the bow using Liquid Nails to seal all joints.
Repeat the sequence for panels 3 and 4.
From the excess canvas cut from the stern, cut two strips 10" by 60" or so. Attach these strips to the side of cockpit stretching from
the underside of the H/F strakes to the D strake. I trim the ends to form a an arch, arching towards the cockpit. These
two strips provide a second layer of canvas to protect the sides of the cockpit when you enter the kayak and protect the
sides from your paddle shafts. They also cover the joint of Panels 1 and 3 and Panels 2 and 4.
Caulk all seams with a thin bead of Liquid nails.
Wet the canvas with a spray bottle of water and allow to dry, in the sun if possible. The caulk will cure faster in the sun.
Figure 2. Installing the Canvas (Press F5-Refresh to Restart the Animation)
Saturday, June 23 through Monday June 25, 2001 - Painted the Hull/Deck (3 hours)
Painted the canvas with 3 coats of Glidden Exterior semi-gloss. Use a brush. Do not use a sprayer.
Attached 1/4 x 3/4 bead molding to the sides (D and E strakes) and the keel. These strips protect the boat from the paddles, docks, and beach. I recommend that you fit the molding to the sides and keel, but paint them separate from the kayak hull. Then attach them after you have completed painting the hull. There are a number of reasons for this, for one: If you attach the moldings to the unfinished hull and paint them with the hull, the moldings will bow away from hull leaving a strip of the hull and the molding back unpainted.
Thursday, June 28, 2001 - The Floor (1/2 hour)
Attached the floor. I made it from two scraps of 1/4 luan plywood. I screwed them (as layers) to Rib 3 only.
Finished the floor with one coat of marine spar varnish. Paint or any other sealer will do.
I cut the foam for the seat and seat back.
Friday, June 29, 2001 - The Backrests (2 hours)
Eber and I sewed backrests for both kayaks. We simply rolled up the closed-cell foam tightly (4 layers thick) and
covered it with canvas. We sewed the canvas by hand. I screwed two strips of double-sided velcro to the inside of Rib 4 to
hold the backrest in place. Also, we attached nylon webbing to the bow and stern for handles. I used finish washers (the cupped washers) to protect the nylon and give it a "finished" look. I used the same washers for the velcro as well. Next week I will add several nylon strap tabs along the F strakes to attach several stretch cargo cords. In regards to the backrest/seat-back, the plans call for a plywood seat-back that you fasten to the floor (seat). In my opinion, the plywood seat-back is uncomfortable. Thus, we made the seatrest/cushions and attached them to Rib 4. It provides plenty of support and is far more comfortable than the plywood.
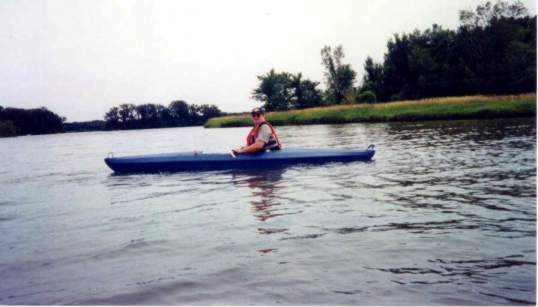
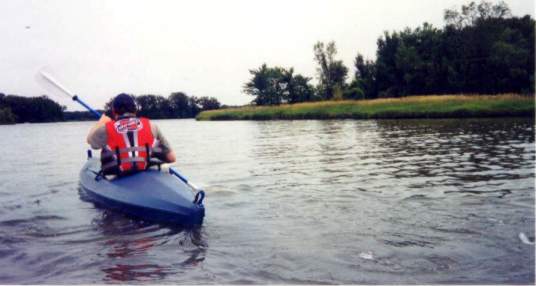
Saturday, June 30, 2001 - The Maiden Voyage (6 hours)
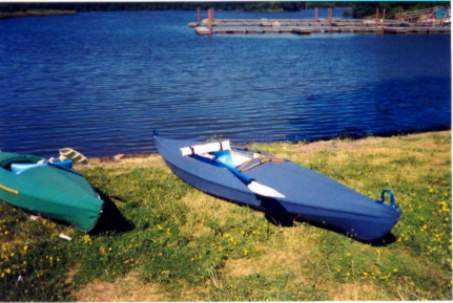
Luzimar, Eber, Olesea, and I took the 12-footer and the 14-footer (its maiden voyage) to a local lake and had a great time. I like the 14-footer much more than the 12-footer. The 12-footer turns quicker, but the 14-footer is more stable for my overweight high-center of gravity body. I was on the lake for about 4 hours and put the kayak through its paces, so to speak. Next week we'll add some more padding to the seat, fine-tune the back rest, add a spray skirt (mostly to protect my white legs from the sun), and add some web tabs for cargo straps.
July 4 - July 7
More fun in the sun. We took the kayaks to Busse Woods and had a great time. I added a sun-skirt to prevent
my legs from getting sunburned.
The 14-footer is the blue kayak.
Luzimar in the 12-footer.
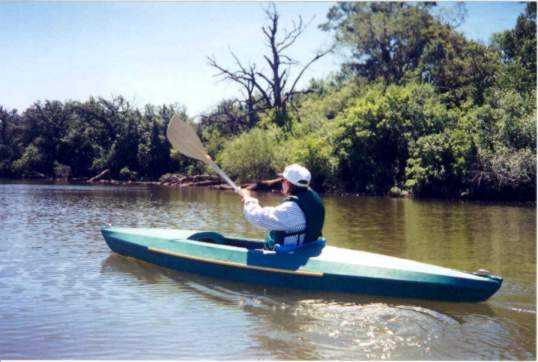
Jack in the 14-footer.
Jack in the 14-footer.
Diary: Expenditures
The following list shows the cost of each item I purchased for the 14-Foot kayak. A few items are not listed,
such as drywall screws and wood glue because I already had them.